


Category Archives: Travel Gear
Traveler’s Must-Haves: Essentials for Every Adventurer

Source : https://tripjive.com
Traveler’s Must-Haves: Essentials for Every Adventurer is a comprehensive guide that provides a detailed list of essential items that every traveler should carry on their journey. This guide covers a wide range of items, from basic necessities such as clothing and toiletries to specialized gear for different types of travel. It also includes tips on how to pack efficiently and effectively, ensuring that adventurers are well-prepared for any situation they may encounter on their travels. Whether you’re a seasoned explorer or a novice adventurer, this guide is an invaluable resource for planning your next trip.
Top 10 Must-Have Essentials for Every Adventurer: A Comprehensive Travel Guide
Traveling is an enriching experience that broadens one’s horizons and offers a unique perspective on life. However, to ensure a smooth and hassle-free journey, it is crucial to be well-prepared. This comprehensive travel guide will highlight the top 10 must-have essentials for every adventurer, ensuring that you are equipped for any situation that may arise during your travels.
First and foremost, a sturdy and reliable backpack is a non-negotiable essential. It should be spacious enough to accommodate all your belongings, yet compact enough to carry around comfortably. Look for a backpack with multiple compartments for easy organization and quick access to your items.
Secondly, a good quality travel adapter is indispensable. Different countries have different plug types and voltage requirements, and a universal travel adapter will ensure that you can charge your devices wherever you are.
Thirdly, a portable power bank is a lifesaver when you’re on the go and don’t have access to a power source. It will keep your devices charged, ensuring that you can capture memorable moments, navigate unfamiliar territories, and stay connected with loved ones.
Next, a travel wallet is a must-have for keeping your money, credit cards, and important documents like your passport and boarding passes safe and organized. Opt for a travel wallet with RFID blocking technology to protect your personal information from electronic pickpocketing.
Fifth on the list is a reusable water bottle. Staying hydrated is crucial, especially when you’re exploring new places. A reusable water bottle is not only environmentally friendly but also cost-effective as you can refill it at water stations.
Moving on, a first aid kit is an essential item that should be in every traveler’s backpack. It should include band-aids, antiseptic wipes, pain relievers, and any personal medication you may need. It’s always better to be safe than sorry.
Seventh, a multi-tool is a handy gadget that combines several tools in one, such as a knife, bottle opener, screwdriver, and scissors. It can come in handy in various situations, from opening a can of food to fixing a loose screw.
Next, a compact travel towel is a versatile item that can be used for drying off after a swim, as a blanket on a chilly flight, or even as a makeshift pillow. Look for a microfiber travel towel as they are lightweight, quick-drying, and take up minimal space in your backpack.
Ninth, a headlamp or a flashlight is essential, especially if you plan on camping or exploring areas with limited lighting. It will help you navigate in the dark and can also be used as a signal in case of emergencies.
Lastly, a good quality travel guidebook or a reliable travel app is a must-have. It will provide you with valuable information about your destination, such as local customs, must-see attractions, and recommended restaurants. It can also help you plan your itinerary and make the most of your trip.
In conclusion, these top 10 must-have essentials will ensure that you are well-prepared for your adventures. Remember, the key to a successful trip lies in careful planning and preparation. So, pack wisely, stay safe, and enjoy your journey to the fullest.In conclusion, every traveler, regardless of their destination, should prioritize packing essential items that ensure their safety, comfort, and convenience. These must-haves include travel documents, appropriate clothing, toiletries, first aid kit, portable chargers, travel adapters, and essential gadgets. These items not only make the journey more enjoyable but also help to handle unexpected situations effectively.
Unlocking Acer Laptop Keyboard Secrets

Source : https://computerguild.com
Unlocking Acer Laptop Keyboard Secrets is an insightful guide that provides detailed information on how to maximize the use of Acer laptop keyboards. It covers a range of topics from basic functions to advanced shortcuts and hidden features. This guide is designed to enhance user experience by revealing lesser-known keyboard secrets that can boost productivity and efficiency. Whether you are a novice user or a tech-savvy professional, this guide offers valuable insights into the full potential of your Acer laptop keyboard.
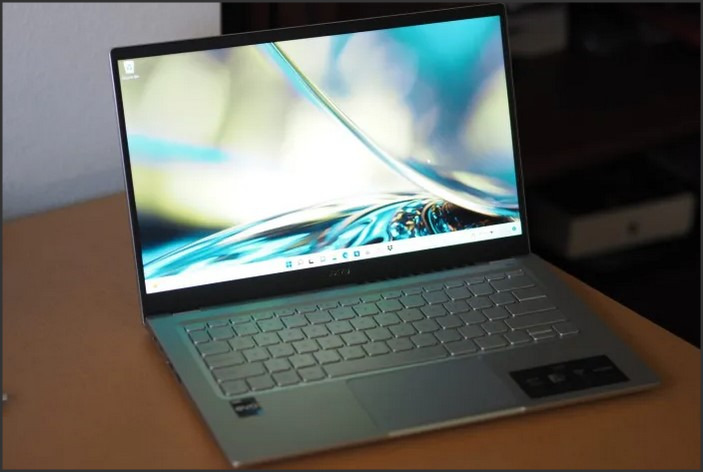
Unlocking the Hidden Features of Your Acer Laptop Keyboard
Unlocking the hidden features of your Acer laptop keyboard can significantly enhance your productivity and overall computing experience. Acer, a leading global manufacturer of computers and laptops, has integrated several unique features into their keyboards that many users may not be aware of. These features, often overlooked, can streamline your workflow, improve your typing speed, and even protect your laptop from potential damage.
One of the most notable features of Acer laptop keyboards is the function keys, also known as “F keys.” These keys, labeled F1 through F12, are located at the top of the keyboard and serve a variety of purposes. For instance, pressing the F1 key typically opens the help menu in most applications, while the F5 key is commonly used to refresh a webpage. However, when combined with the “Fn” key, these function keys unlock a whole new set of capabilities. For example, pressing Fn + F6 can dim your laptop’s screen, while Fn + F7 can turn off the touchpad to prevent accidental clicks when typing.
Another hidden feature of Acer laptop keyboards is the number pad, which is integrated into the right side of the keyboard. This feature is particularly useful for individuals who frequently work with numbers, such as accountants or data analysts. To activate the number pad, simply press the “Num Lock” key. Once activated, the keys from 7 to 9 double as 7, 8, and 9 on the number pad, U, I, O become 4, 5, 6, and J, K, L turn into 1, 2, 3. The M key serves as 0.
Acer laptop keyboards also come with a set of multimedia keys that allow you to control your media playback directly from your keyboard. These keys, usually represented by symbols, let you play or pause music, skip to the next track, or adjust the volume without having to navigate away from your current task. To use these keys, you typically need to hold down the “Fn” key and then press the corresponding multimedia key.
In addition to these productivity-enhancing features, Acer laptop keyboards also have built-in features designed to protect your laptop. For example, the “Acer DustDefender” technology helps prevent dust accumulation, which can lead to overheating and damage to internal components. This feature uses an innovative mechanism that reverses the fan to flush out dust particles. To activate this feature, you need to press the “Fn” key and the “F” key with a fan symbol on it.
Lastly, Acer has incorporated a feature known as “Acer Bluelight Shield” into their laptop keyboards. This feature reduces the amount of blue light emitted by the laptop’s screen, which can cause eye strain and disrupt sleep patterns. To activate this feature, press the “Fn” key and the “F” key with an eye symbol on it.
In conclusion, Acer laptop keyboards are packed with hidden features that can enhance your productivity, improve your computing experience, and protect your laptop. By familiarizing yourself with these features, you can unlock the full potential of your Acer laptop keyboard and make the most of your computing experience.In conclusion, unlocking Acer laptop keyboard secrets can enhance user experience by providing shortcuts and features that improve productivity and efficiency. These secrets may include special function keys, hidden symbols, and keyboard combinations that perform specific tasks. Understanding these secrets can help users to fully utilize the capabilities of their Acer laptop keyboard.
Caps Lock on HP Laptop: Troubleshooting and Usage Tips
Caps Lock is a useful feature on HP laptops that allows you to quickly type in all capital letters. However, if you are having trouble with your Caps Lock key, or if you are unsure of how to use it, this guide will provide you with troubleshooting and usage tips to help you get the most out of your HP laptop. We will cover topics such as how to enable and disable Caps Lock, how to troubleshoot Caps Lock issues, and how to use Caps Lock in different applications. With this guide, you will be able to make the most of your HP laptop’s Caps Lock feature.
How to Troubleshoot Caps Lock Issues on HP Laptops
Troubleshooting Caps Lock issues on HP laptops can be a frustrating experience. Fortunately, there are a few steps that can be taken to help resolve the issue.
First, check the keyboard settings in the Windows Control Panel. To do this, open the Control Panel, select “Keyboard”, and then select “Change Key Settings”. Make sure that the “Caps Lock” option is enabled. If it is not, enable it and then save the changes.
If the issue persists, try restarting the laptop. This can often resolve the issue. If the issue still persists, try uninstalling and reinstalling the keyboard driver. To do this, open the Device Manager, select “Keyboards”, right-click on the keyboard driver, and select “Uninstall”. Then, restart the laptop and reinstall the driver.
If the issue still persists, it may be necessary to replace the keyboard. To do this, refer to the user manual for instructions on how to remove and replace the keyboard.
If none of these steps resolve the issue, contact HP Support for further assistance.
Tips for Using Caps Lock on HP Laptops for Maximum Efficiency
1. Use Caps Lock sparingly. Caps Lock should only be used when absolutely necessary, such as when typing acronyms or proper nouns. Overuse of Caps Lock can make text difficult to read and can be seen as shouting in online communication.
2. Utilize the Shift key. The Shift key can be used to capitalize individual letters, which is often more efficient than using Caps Lock.
3. Use the Caps Lock key in combination with other keys. The Caps Lock key can be used in combination with other keys, such as the Alt and Ctrl keys, to perform various functions.
4. Familiarize yourself with the Caps Lock key’s location. HP laptops typically have the Caps Lock key located in the same area as the other keys, so it is important to become familiar with its location.
5. Utilize the Caps Lock indicator. HP laptops typically have an indicator light that will turn on when Caps Lock is enabled. This can be helpful in ensuring that Caps Lock is not accidentally left on.
6. Utilize the Caps Lock key’s shortcut. On HP laptops, the Caps Lock key can be used in combination with the Fn key to quickly enable or disable Caps Lock.In conclusion, Caps Lock on HP Laptops can be a useful tool for quickly typing in all capital letters. However, it is important to be aware of the potential issues that can arise from using Caps Lock, such as accidentally typing in all capital letters when you don’t mean to. By following the troubleshooting and usage tips outlined in this article, you can ensure that you are using Caps Lock correctly and efficiently.
Oversized Bathtubs: Luxuriating in Spacious Soaking Tubs
Oversized bathtubs are the perfect way to relax and unwind after a long day. Whether you’re looking for a luxurious spa experience or just a comfortable soak, Oversized bathtubs provide plenty of room to stretch out and enjoy a hot bath. With a variety of styles and sizes available, you can find the perfect oversized bathtub to fit your needs. From classic clawfoot tubs to modern freestanding tubs, Oversized bathtubs offer a luxurious and spacious soaking experience. With the right accessories, you can create a spa-like atmosphere in your own home. So, if you’re looking for a way to relax and unwind, consider investing in an oversized bathtub.
How to Choose the Perfect Oversized Bathtub for Your Home: Tips for Finding the Right Size and Style
When it comes to choosing the perfect oversized bathtub for your home, there are several factors to consider. Size, style, and budget are all important considerations when selecting the right bathtub for your space. Here are some tips to help you find the perfect oversized bathtub for your home.
1. Measure Your Space: Before you start shopping for an oversized bathtub, it’s important to measure the space you have available. Measure the length, width, and height of the area where you plan to install the bathtub. This will help you determine the size of the bathtub you need.
2. Consider Your Budget: Oversized bathtubs can be expensive, so it’s important to consider your budget when selecting the right one for your home. Consider the materials you want to use and the features you need. This will help you narrow down your choices and find a bathtub that fits your budget.
3. Choose the Right Style: There are many different styles of Oversized bathtubs available, so it’s important to choose one that fits your home’s aesthetic. Consider the overall look and feel of your bathroom and choose a bathtub that complements the space.
4. Consider the Features: When selecting an oversized bathtub, it’s important to consider the features you need. Do you want a bathtub with jets or a built-in shower? Do you need a bathtub with a built-in seat or a hand-held showerhead? Consider the features you need and choose a bathtub that meets your needs.
By following these tips, you can find the perfect oversized bathtub for your home. Consider your space, budget, style, and features to find the right bathtub for your needs. With the right bathtub, you can create a luxurious and relaxing space in your home.
The Benefits of Installing an Oversized Bathtub: Enjoying a Relaxing and Luxurious Soaking Experience
The installation of an oversized bathtub can provide a luxurious and relaxing soaking experience. An oversized bathtub is typically larger than a standard-sized bathtub, allowing for a more spacious and comfortable bathing experience. This type of bathtub can also provide a greater depth of water, allowing for a deeper and more relaxing soak.
The installation of an oversized bathtub can also provide a number of health benefits. Soaking in a hot bath can help to reduce stress and tension, as well as improve circulation and reduce inflammation. Additionally, the deeper water level of an oversized bathtub can help to improve posture and reduce back pain.
The installation of an oversized bathtub can also provide aesthetic benefits. An oversized bathtub can be a beautiful addition to any bathroom, providing a luxurious and inviting atmosphere. Additionally, the larger size of an oversized bathtub can provide a greater sense of privacy, allowing for a more intimate and relaxing bathing experience.
Finally, the installation of an oversized bathtub can provide a number of practical benefits. An oversized bathtub can provide a greater capacity for water, allowing for a longer and more enjoyable soak. Additionally, the larger size of an oversized bathtub can provide a greater surface area for cleaning, making it easier to keep the bathtub clean and hygienic.
In conclusion, the installation of an oversized bathtub can provide a number of benefits, including a luxurious and relaxing soaking experience, health benefits, aesthetic benefits, and practical benefits. For these reasons, an oversized bathtub can be a great addition to any bathroom.Oversized bathtubs provide a luxurious and spacious soaking experience that is sure to be enjoyed by anyone who takes the time to relax and enjoy the experience. With a variety of sizes and styles available, there is sure to be an oversized bathtub that fits any bathroom and any budget. Whether you are looking for a luxurious spa-like experience or just a comfortable and relaxing soak, an oversized bathtub is the perfect choice.
Lenovo Hotkeys: Mastering Keyboard Shortcuts on Your Lenovo Laptop
Lenovo laptops are some of the most popular and reliable laptops on the market. They come with a variety of features and functions that make them great for work, school, and leisure. One of the most useful features of Lenovo laptops is the ability to use hotkeys, or keyboard shortcuts, to quickly access and use certain functions. In this guide, we’ll discuss how to use Lenovo hotkeys to make the most of your laptop. We’ll cover the basics of hotkeys, how to customize them, and how to use them to make your life easier. With the help of this guide, you’ll be able to master the keyboard shortcuts on your Lenovo laptop in no time.
Exploring the Benefits of Using Lenovo Hotkeys: A Guide to Streamlining Your Workflow
Hotkeys are a powerful tool for streamlining your workflow and increasing your productivity. Lenovo hotkeys are no exception. By taking advantage of the various hotkeys available on Lenovo laptops, you can quickly and easily access a variety of functions and features. This guide will explore the benefits of using Lenovo hotkeys and provide an overview of how to use them.
One of the primary benefits of using Lenovo hotkeys is that they allow you to quickly access commonly used functions and features. By pressing a single key or combination of keys, you can quickly open applications, adjust settings, and perform other tasks. This can save you time and effort, as you don’t have to navigate through menus or search for the function you need.
Another benefit of using Lenovo hotkeys is that they can help you stay organized. By assigning hotkeys to specific tasks, you can quickly access the functions you need without having to remember where they are located. This can help you stay focused and productive, as you don’t have to waste time searching for the right function.
Finally, using Lenovo hotkeys can help you customize your laptop to suit your needs. By assigning hotkeys to specific tasks, you can quickly access the functions you need without having to remember where they are located. This can help you stay organized and productive, as you don’t have to waste time searching for the right function.
Using Lenovo hotkeys is easy. To access the hotkeys, simply press the “Fn” key and the appropriate function key at the same time. For example, pressing “Fn” and “F2” will open the settings menu. You can also customize the hotkeys to suit your needs. To do this, open the Lenovo Vantage app and select “Hotkeys” from the menu. From here, you can assign hotkeys to specific tasks or functions.
In conclusion, using Lenovo hotkeys can be a great way to streamline your workflow and increase your productivity. By taking advantage of the various hotkeys available on Lenovo laptops, you can quickly and easily access a variety of functions and features. Additionally, you can customize the hotkeys to suit your needs. With a little practice, you can quickly become an expert at using Lenovo hotkeys.
Unlocking the Power of Lenovo Hotkeys: Tips and Tricks for Becoming a Keyboard Shortcut Pro
Lenovo hotkeys are powerful tools that can help you become a keyboard shortcut pro. With the right knowledge and practice, you can unlock the full potential of these shortcuts and make your workflows more efficient. In this article, we’ll discuss the basics of Lenovo hotkeys, provide tips and tricks for mastering them, and explain how to customize them to your needs.
First, let’s discuss the basics of Lenovo hotkeys. Hotkeys are keyboard shortcuts that allow you to quickly access certain functions or features. On Lenovo laptops, these shortcuts are usually located on the function keys (F1-F12) and are labeled with icons. To use a hotkey, simply press the corresponding function key while holding down the “Fn” key.
Now that you know the basics, let’s discuss some tips and tricks for mastering Lenovo hotkeys. First, practice using the hotkeys regularly. This will help you become more familiar with them and make them easier to remember. Second, customize the hotkeys to your needs. You can do this by going to the “Keyboard” section of the Lenovo Settings app and selecting “Hotkey Settings.” Here, you can assign different functions to each of the function keys.
Finally, take advantage of the “Fn Lock” feature. This feature allows you to lock the “Fn” key so that you don’t have to hold it down while using the hotkeys. To enable this feature, press and hold the “Fn” key and then press the “Fn Lock” key (usually located near the “F1” key).
By following these tips and tricks, you can unlock the power of Lenovo hotkeys and become a keyboard shortcut pro. With practice and customization, you can make your workflows more efficient and save time.Lenovo hotkeys are a great way to maximize productivity and efficiency on your Lenovo laptop. With the help of the Lenovo hotkeys, you can quickly access the most commonly used functions and features of your laptop. By mastering the keyboard shortcuts, you can save time and effort while using your laptop. With the help of the Lenovo hotkeys, you can easily navigate through your laptop and access the features you need quickly and easily.
Keyboard Locked Lenovo Laptop: Troubleshooting Tips

Source : https://tse1.mm.bing.net
If you have a Lenovo laptop that is locked with a keyboard, you may be feeling frustrated and overwhelmed. Fortunately, there are some troubleshooting tips that can help you get your laptop back up and running. In this article, we will discuss some of the most common causes of a locked keyboard on a Lenovo laptop and provide some tips on how to fix the issue. We will also provide some general advice on how to prevent this issue from occurring in the future. By following these tips, you should be able to get your laptop back up and running in no time.
How to Unlock a Keyboard Locked Lenovo Laptop: Step-by-Step Troubleshooting Guide
1. Check the Num Lock Key: The first step in troubleshooting a locked Lenovo laptop keyboard is to check the Num Lock key. This key is usually located on the top row of the keyboard and is labeled with the number “1”. If the Num Lock key is on, press it to turn it off.
2. Check the Keyboard Lock: The next step is to check the keyboard lock. This is usually located on the side of the laptop and is labeled with a lock symbol. If the keyboard lock is on, press it to unlock the keyboard.
3. Check the BIOS Settings: If the Num Lock and keyboard lock are both off, then the next step is to check the BIOS settings. To do this, restart the laptop and press the F2 key when the Lenovo logo appears. This will open the BIOS settings. Look for a setting labeled “Keyboard Lock” and make sure it is set to “Off”.
4. Check the Keyboard Connections: If the BIOS settings are correct, then the next step is to check the keyboard connections. Make sure the keyboard is securely connected to the laptop and that all of the cables are firmly in place.
5. Reset the Keyboard: If all of the above steps have been completed and the keyboard is still locked, then the next step is to reset the keyboard. To do this, press the Windows key and the R key at the same time. This will open the Run window. Type “devmgmt.msc” into the box and press Enter. This will open the Device Manager. Find the keyboard in the list and right-click on it. Select “Uninstall” and then restart the laptop. This should reset the keyboard and unlock it.
If none of the above steps work, then it is likely that the keyboard is defective and needs to be replaced.
Common Causes of Keyboard Lockouts on Lenovo Laptops and How to Fix Them
Keyboard lockouts on Lenovo laptops are a common issue that can be caused by a variety of factors. Fortunately, there are several steps you can take to troubleshoot and fix the issue.
One of the most common causes of keyboard lockouts on Lenovo laptops is a driver issue. Outdated or corrupted drivers can cause the keyboard to malfunction, resulting in a lockout. To fix this, you should update your laptop’s drivers. You can do this manually by visiting the manufacturer’s website and downloading the latest drivers, or you can use a driver update tool to automate the process.
Another common cause of keyboard lockouts is a hardware issue. If the keyboard is physically damaged or malfunctioning, it can cause a lockout. To fix this, you should check the keyboard for any signs of damage and replace it if necessary.
Finally, keyboard lockouts can also be caused by a software issue. If your laptop is running an outdated version of Windows or has a virus, it can cause the keyboard to malfunction. To fix this, you should update your laptop’s operating system and run a virus scan to remove any malicious software.
By following these steps, you should be able to troubleshoot and fix the issue of keyboard lockouts on your Lenovo laptop.
Conclusion
In conclusion, troubleshooting a Keyboard locked Lenovo laptop can be a difficult task. However, with the right knowledge and tools, it is possible to resolve the issue. By following the troubleshooting tips outlined in this article, you can quickly and easily identify and fix the issue. Additionally, if the issue persists, it is recommended to contact a professional technician for further assistance.
Acer Ubuntu: Exploring the World of Linux Laptops
Source : https://www.digitaltrends.com
Acer Ubuntu is a Linux-based laptop series from Acer, one of the world’s leading computer manufacturers. It is designed to provide users with a powerful and reliable computing experience, while also offering the flexibility and freedom of open source software. With Acer Ubuntu, users can enjoy the latest features and applications, while also taking advantage of the security and stability of the Linux operating system. Whether you’re a beginner or an experienced user, Acer Ubuntu laptops offer a great way to explore the world of Linux.
How to Get the Most Out of Your Acer Ubuntu Laptop: Tips and Tricks for Optimizing Performance
If you own an Acer Ubuntu laptop, you know that it is a powerful and reliable machine. However, like any computer, it can benefit from a few tweaks and optimizations to get the most out of it. Here are some tips and tricks to help you get the most out of your Acer Ubuntu laptop.
1. Update Your System: Keeping your system up to date is essential for optimal performance. Make sure to regularly check for updates and install them as soon as they become available. This will ensure that your system is running the latest software and security patches.
2. Optimize Your Battery Life: Battery life is an important factor when it comes to laptops. To maximize your battery life, make sure to adjust your power settings to the “Power Saver” mode. Additionally, you can install a battery monitoring app to help you keep track of your battery usage.
3. Clean Up Your System: Over time, your system can become cluttered with unnecessary files and programs. To keep your system running smoothly, it’s important to regularly clean up your system. You can do this by using a disk cleanup tool or by manually deleting unnecessary files.
4. Install Performance-Enhancing Software: There are a variety of software programs available that can help you optimize your system’s performance. These programs can help you free up disk space, improve system speed, and more.
5. Use a Solid-State Drive: Solid-state drives (SSDs) are much faster than traditional hard drives. If your laptop has an available SSD slot, consider upgrading to an SSD for improved performance.
By following these tips and tricks, you can get the most out of your Acer Ubuntu laptop. With a few simple optimizations, you can ensure that your system is running at its best.
A Comprehensive Guide to Installing and Configuring Acer Ubuntu on Your Laptop
Installing and configuring Acer Ubuntu on your laptop can be a daunting task, but with the right guidance, it can be a straightforward process. This comprehensive guide will provide you with the necessary steps to ensure a successful installation and configuration of Acer Ubuntu on your laptop.
Before beginning the installation process, it is important to ensure that your laptop meets the minimum system requirements for running Acer Ubuntu. These requirements include a minimum of 2GB of RAM, a minimum of 10GB of free hard drive space, and a 64-bit processor. Additionally, you should ensure that your laptop is connected to the internet and that you have a USB drive with at least 4GB of storage space.
Once you have verified that your laptop meets the minimum system requirements, you can begin the installation process. First, you will need to download the latest version of Acer Ubuntu from the official website. Once the download is complete, you will need to create a bootable USB drive. To do this, you will need to use a program such as Rufus or UNetbootin. Once the USB drive is created, you will need to insert it into your laptop and reboot the system.
Once your laptop has rebooted, you will need to select the USB drive as the boot device. This will initiate the installation process. During the installation process, you will be asked to select a language, create a user account, and set up a password. Once these steps are complete, the installation process will begin.
Once the installation is complete, you will need to configure Acer Ubuntu. This includes setting up the display resolution, installing additional software, and configuring the network settings. Additionally, you will need to install any necessary drivers for your laptop.
Finally, you will need to update your system. This can be done by running the Software Updater utility. This utility will check for any available updates and install them automatically.
By following these steps, you should be able to successfully install and configure Acer Ubuntu on your laptop. With the right guidance, you can ensure that your laptop is running the latest version of Acer Ubuntu and is configured correctly.
Conclusion
Acer Ubuntu laptops offer a great way to explore the world of Linux. They are reliable, powerful, and feature-rich, making them an ideal choice for those looking to make the switch from Windows or Mac. With a wide range of models to choose from, there is sure to be an Acer Ubuntu laptop that meets your needs. Whether you are a beginner or an experienced user, Acer Ubuntu laptops are a great way to experience the power and flexibility of Linux.
LifeStraw Saltwater: A Revolutionary Water Purification Tool

Source : https://snarkynomad.com
LifeStraw saltwater is a revolutionary water purification tool that is revolutionizing the way people access clean drinking water. This innovative tool uses a patented filtration system to remove 99.99% of bacteria, viruses, and other contaminants from saltwater, making it safe to drink. LifeStraw saltwater is a great solution for those who live in areas with limited access to clean drinking water, as well as for those who are looking for a convenient and affordable way to purify their own water. With its easy-to-use design and advanced filtration technology, LifeStraw saltwater is a must-have for anyone looking to ensure they have access to clean drinking water.
How LifeStraw Saltwater is Revolutionizing Water Purification: A Look at the Benefits and Advantages
LifeStraw saltwater is revolutionizing the way we purify water. This innovative product is designed to make it easier and more efficient to turn saltwater into safe drinking water. It is a game-changer for those who live in coastal areas or who are travelling in remote locations.
LifeStraw saltwater works by using a process called reverse osmosis. This process involves pushing saltwater through a semi-permeable membrane, which filters out the salt and other contaminants. The result is clean, safe drinking water.
The benefits of LifeStraw saltwater are numerous. First, it is incredibly efficient. It can turn up to 4,000 liters of saltwater into safe drinking water, making it ideal for those who need to purify large amounts of water. It is also incredibly easy to use. All you need to do is fill the container with saltwater and let the filter do the rest.
Another advantage of LifeStraw saltwater is that it is incredibly affordable. It is much cheaper than other water purification systems, making it accessible to those who may not be able to afford more expensive options.
Finally, LifeStraw saltwater is incredibly durable. It is designed to last for up to five years, making it a great long-term investment.
Overall, LifeStraw saltwater is revolutionizing the way we purify water. It is efficient, easy to use, affordable, and durable, making it an ideal choice for those who need to purify large amounts of saltwater.
Exploring the Science Behind LifeStraw Saltwater: How It Works to Purify Seawater for Drinking
LifeStraw saltwater is a revolutionary device that can turn seawater into safe drinking water. This innovative technology is based on a simple yet effective filtration process that removes harmful bacteria, viruses, and other contaminants from seawater.
The LifeStraw saltwater works by using a combination of filtration and reverse osmosis. The filtration process begins with a hollow fiber membrane that is designed to remove particles larger than 0.2 microns. This membrane acts as a physical barrier, trapping particles such as bacteria, viruses, and other contaminants. The reverse osmosis process then takes place, which uses pressure to force the water through a semi-permeable membrane. This membrane is designed to remove dissolved salts and other impurities from the water.
The LifeStraw saltwater also uses a carbon filter to remove chlorine, pesticides, and other chemicals from the water. This filter is designed to reduce the taste and odor of the water, making it more palatable.
The LifeStraw saltwater is an effective and efficient way to purify seawater for drinking. It is easy to use and requires no electricity or additional equipment. This makes it an ideal solution for those who are in need of safe drinking water in remote areas or during emergencies.
The LifeStraw saltwater is a revolutionary device that can turn seawater into safe drinking water. It uses a combination of filtration and reverse osmosis to remove harmful bacteria, viruses, and other contaminants from the water. It also uses a carbon filter to reduce the taste and odor of the water, making it more palatable. This device is an effective and efficient way to purify seawater for drinking, and it is easy to use and requires no additional equipment.
Conclusion
LifeStraw saltwater is a revolutionary water purification tool that has the potential to revolutionize the way we access clean drinking water. It is a simple, cost-effective, and sustainable solution to the global water crisis. With its ability to filter out 99.99% of bacteria, viruses, and other contaminants, it can provide safe drinking water to people in remote areas and those affected by natural disasters. LifeStraw saltwater is a powerful tool that can help to improve the lives of millions of people around the world.
What Is the ‘N’ Symbol on My Phone: Understanding Mobile Icons
The ‘N’ symbol on your phone can be confusing and intimidating, especially if you’re new to the world of mobile technology. This symbol is often seen on smartphones and tablets, but what does it mean? Understanding mobile icons can be tricky, but it’s important to know what they mean in order to use your device properly. In this article, we’ll explain what the ‘N’ symbol is and how it can help you use your phone more efficiently. We’ll also discuss other common mobile icons and their meanings, so you can better understand your device.
What Does the ‘N’ Symbol Mean on My Phone? Exploring the Meaning Behind Common Mobile Icons
The ‘N’ symbol is a common icon found on many mobile phones. It is used to indicate that the device is connected to a network, such as a cellular network or Wi-Fi. This symbol is typically found in the status bar of the device, usually in the top right corner.
The ‘N’ symbol is usually accompanied by a number, which indicates the type of network the device is connected to. For example, a ‘3G’ or ‘4G’ symbol indicates that the device is connected to a cellular network, while a ‘Wi-Fi’ symbol indicates that the device is connected to a Wi-Fi network.
The ‘N’ symbol is also used to indicate that the device is connected to a network, but is not actively using it. This is usually indicated by a greyed-out ‘N’ symbol. This can happen when the device is in a low-signal area, or when the device is in airplane mode.
In addition to the ‘N’ symbol, other symbols may also appear in the status bar. These symbols can indicate the strength of the network connection, the type of network connection, or the status of the device’s data connection.
It is important to understand the meaning of the ‘N’ symbol and other symbols in the status bar, as they can provide valuable information about the device’s connection to a network. Knowing the meaning of these symbols can help users troubleshoot any network-related issues they may be experiencing.
How to Identify and Interpret Mobile Icons: A Guide to Understanding the ‘N’ Symbol on Your Phone
The ‘N’ symbol is a common icon found on many mobile devices. It is used to indicate a network connection, and can be seen in the status bar of your device. Understanding what this symbol means and how to interpret it can help you troubleshoot any network-related issues you may be experiencing.
The ‘N’ symbol is a representation of the IEEE 802.11n wireless networking standard. This standard is used to provide wireless access to the internet, and is the most commonly used wireless networking protocol. When the ‘N’ symbol is present, it indicates that your device is connected to a network that is using this standard.
The ‘N’ symbol can also be used to indicate the strength of your network connection. If the symbol is full, it indicates that you have a strong connection. If the symbol is partially filled, it indicates that your connection is weaker. If the symbol is not present at all, it indicates that you are not connected to a network.
In addition to the ‘N’ symbol, you may also see other symbols in your status bar. These symbols can indicate the type of network connection you are using, such as Wi-Fi, 4G, or 3G. They can also indicate the type of security protocol being used, such as WPA2 or WEP.
By understanding the ‘N’ symbol and other icons in your status bar, you can quickly identify any network-related issues you may be experiencing. This can help you troubleshoot any problems and ensure that you have a strong and secure connection.
Conclusion
The ‘N’ symbol on a phone is a notification indicator that lets the user know when they have received a new message or alert. It is a useful feature that helps keep users informed of important updates and notifications. Understanding mobile icons can help users make the most of their device and stay up to date with the latest information.
iTour Voice Translator: Your Multilingual Travel Companion
iTour voice translator is the perfect travel companion for anyone who wants to explore the world without worrying about language barriers. This innovative device is designed to help you communicate with people in different languages, allowing you to make the most of your travels. With its intuitive voice recognition technology, iTour voice translator can quickly and accurately translate your words into the language of your choice. Whether you’re traveling for business or pleasure, iTour voice translator will make sure you can communicate with anyone, anywhere.
How iTour Voice Translator Can Help You Navigate Foreign Cities with Ease
Traveling to a foreign city can be an exciting and rewarding experience, but it can also be daunting if you don’t speak the language. Fortunately, iTour voice translator can help you navigate foreign cities with ease.
This innovative device is a pocket-sized translator that can help you communicate with locals in over 30 languages. It is equipped with a powerful speech recognition system that can accurately translate your words into the language of your choice. The device also has a built-in microphone and speaker, so you can easily converse with locals without having to worry about language barriers.
The iTour voice translator also comes with a variety of useful features. It has a built-in dictionary that can help you look up words and phrases in the language you are trying to learn. It also has a phrasebook that contains commonly used phrases in the language you are trying to learn. This can be especially helpful when you are trying to ask for directions or order food.
The iTour voice translator also has a GPS system that can help you find your way around a foreign city. It can provide you with detailed maps and directions to help you get to your destination. It also has a currency converter that can help you calculate prices in the local currency.
The iTour voice translator is an invaluable tool for travelers who want to explore foreign cities without worrying about language barriers. With its powerful speech recognition system, built-in dictionary, phrasebook, and GPS system, it can help you navigate foreign cities with ease.
Exploring the Benefits of Using iTour Voice Translator for Multilingual Travelers
Traveling abroad can be a daunting experience for multilingual travelers, as they often face language barriers that can make it difficult to communicate with locals. Fortunately, the advent of technology has made it easier for travelers to bridge the language gap. One such tool is the iTour voice translator, a device that can help multilingual travelers communicate more effectively while abroad.
The iTour voice translator is a handheld device that can translate speech in real-time. It is equipped with a microphone and speaker, allowing users to speak into the device and hear the translation in their chosen language. The device is also equipped with a variety of languages, including English, Spanish, French, German, Italian, and Chinese. This makes it an ideal tool for multilingual travelers, as they can easily switch between languages to communicate with locals.
The iTour voice translator also offers a variety of features that make it an invaluable tool for travelers. For instance, the device can recognize different dialects and accents, making it easier for travelers to understand locals. Additionally, the device can be used to translate written text, such as signs and menus. This makes it easier for travelers to navigate unfamiliar environments.
The iTour voice translator also offers a variety of other features that make it an ideal tool for travelers. For instance, the device can be used to store and access travel information, such as maps and directions. Additionally, the device can be used to access the internet, allowing travelers to stay connected while abroad.
Overall, the iTour voice translator is an invaluable tool for multilingual travelers. It can help bridge the language gap and make it easier for travelers to communicate with locals. Additionally, the device offers a variety of features that make it an ideal tool for travelers, such as the ability to recognize different dialects and accents, translate written text, store and access travel information, and access the internet. For these reasons, the iTour voice translator is an invaluable tool for multilingual travelers.
Conclusion
iTour voice translator: Your Multilingual Travel Companion is an invaluable tool for travelers who need to communicate in multiple languages. It is easy to use, reliable, and provides accurate translations in a variety of languages. With its voice recognition technology, it can quickly and accurately translate conversations, making it a great companion for travelers who need to communicate in multiple languages. With its ability to translate in real-time, it can help travelers navigate unfamiliar places and make their travels more enjoyable.